Introduction
SellStack is an advanced e-commerce infrastructure for real-time supply-chain automation, offering full integration with the Dynamics 365 ERP system. To help you get started, we have prepared this instruction manual, which explains how to correctly configure the fundamental entities in Dynamics 365 and work with them in SellStack.
Users
To access the shop and make purchases in our B2B environment, you must properly configure a client. This involves setting up several components in Dynamics 365:
- Customer
- Company Contact
- Person Contact
1. Customer
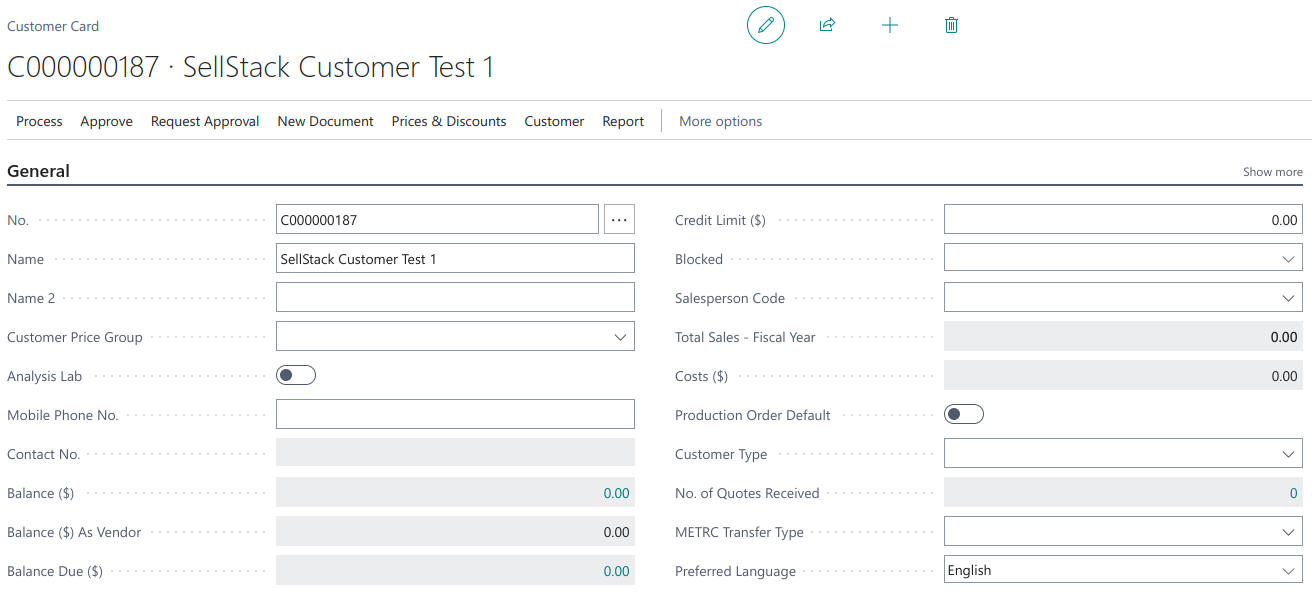
Open a Customer Card by going to Sales Setup -> Customers -> New, and make sure the following fields are filled out:
- No (ID field)
- Name
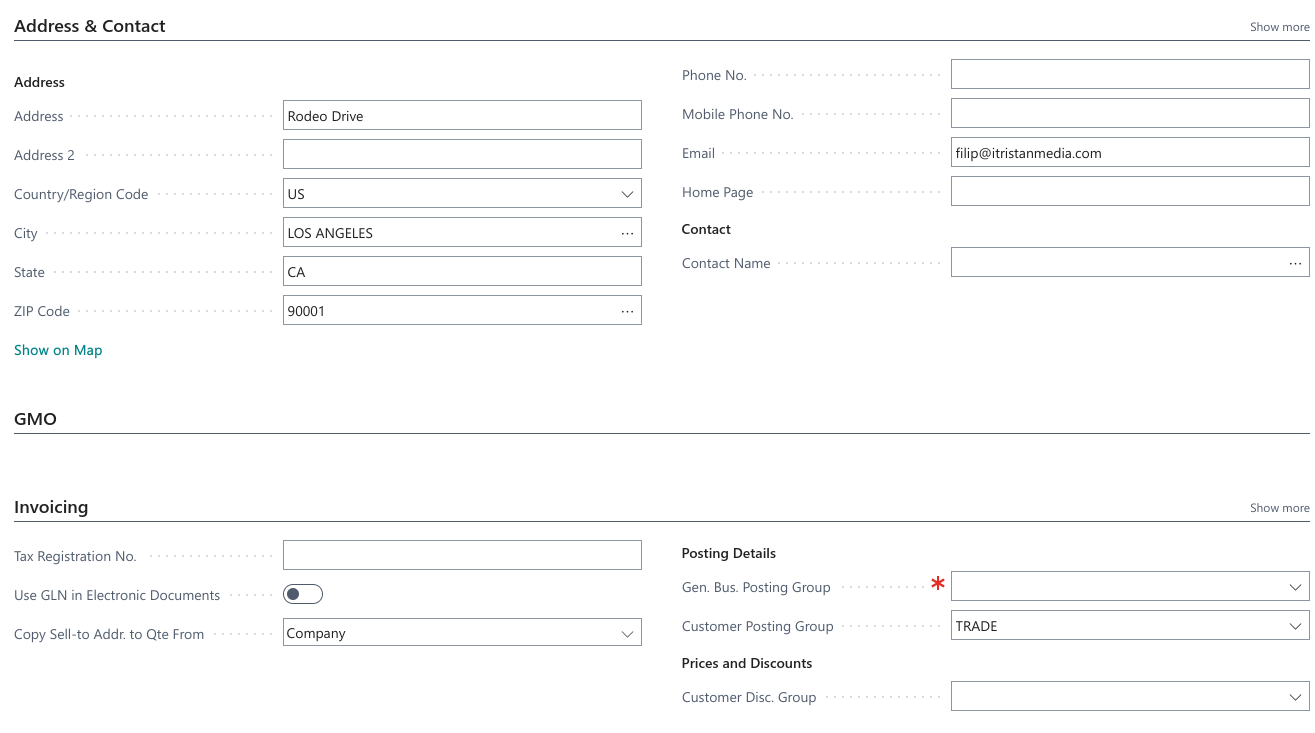
- Address
- Country/Region Code
- City
- State (if the country is the US or Canada, also use two-letter code)
- ZIP Code
- Customer Posting Group (if this is not set up, then orders will not process)
Refer to the example in the images below (your view may vary slightly). Once the Customer is configured correctly, it will appear shortly in the Businesses section of SellStack Admin.
This address data will be the billing address for all orders placed on behalf of this business.
2. Company Contact
A Company entity in 365 represents your organization. Most 365 Instances automatically set up a Contact/Company once a Customer Card has been created. If yours has not, go to Sales Setup -> Contacts -> New, and make sure the following fields are filled out:
- No (ID field)
- Name
- Type (select ‘Company’)

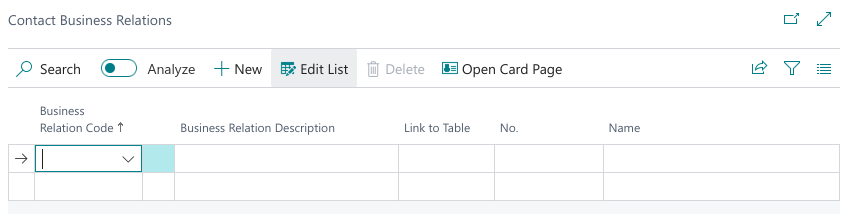
A mandatory step is also to link the created Company record with some already created Customer created. This can be done by clicking the Business Relation field. This will open a pop-up window with the Contact Business Relations table. There, you can link your Company with one or multiple Customer records by filling in the following fields:
- Business Relation Code
- Link to Table (select Customer table)
- No (select Customer record from the dropdown menu)
In the Customer Card form, you can also link your organization to its contact persons. However, we recommend doing this step in the Person Contact Card (see the docs below).

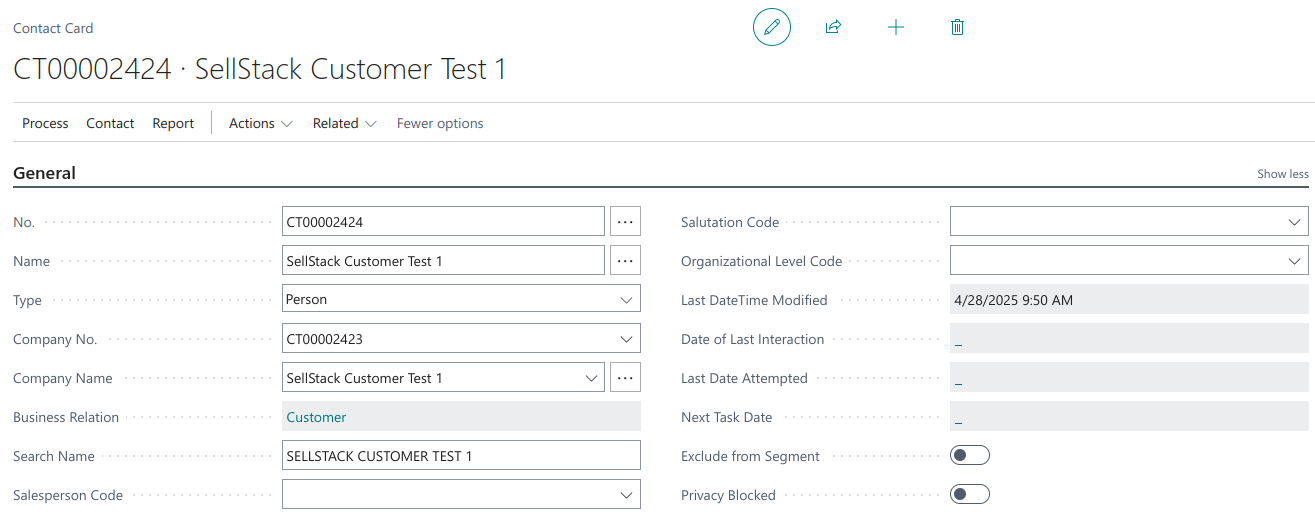
3. Person Contact
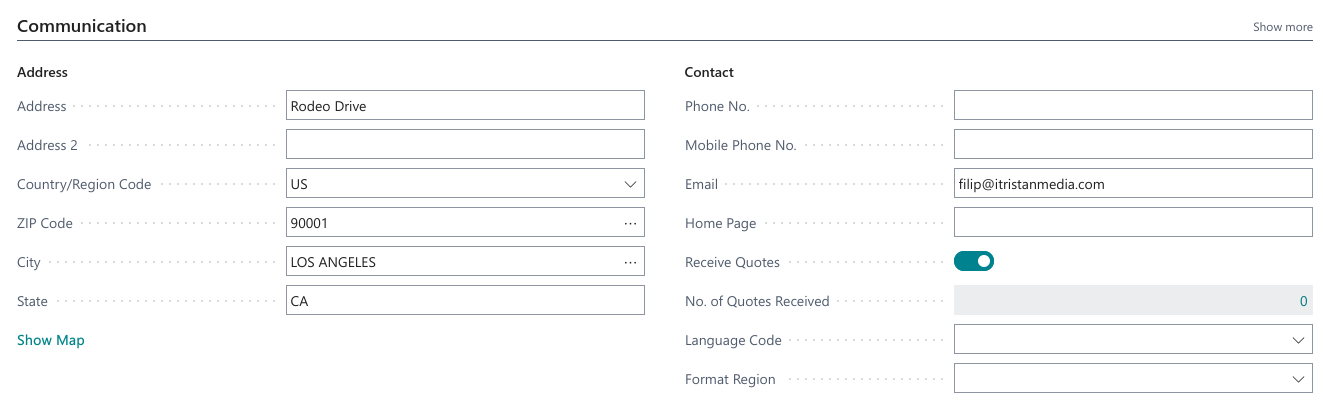
A person working for a particular organization is set up in a similar way as the company by going to Sales Setup -> Contacts -> New. Make sure to fill in the following fields:
- No (ID field)
- Name
- Type (select ‘Person’)
- Company No (select your Company record from the dropdown menu)
- Email (this one is critical: it will be their username in SellStack)
Person Contacts are not directly linked to the Customer Card but are indirectly associated via the Company Contact.
Once the Person Contact is configured correctly, it will appear shortly in the Customers section of SellStack Admin. You will then receive a registration email to verify the provided address, followed by a password‐reset email to set your SellStack password.
Use the newly created SellStack customer account to access the shop and make purchases.
PLEASE NOTE: During development and in the sandbox, email sends do not complete; Mailtrap intercepts them. If you need to see an email, please contact iTristan support. Otherwise, enable and verify a user within the SellStack Admin panel under Customer/Edit.
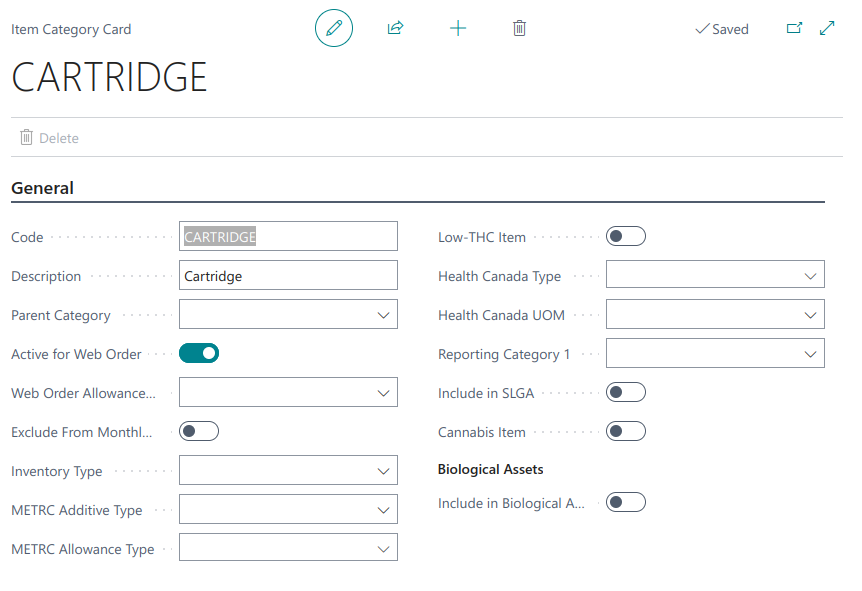
Categories
Each product can be assigned to a category. You can create or select one on the Item Category Card, and locate existing categories via the search bar in Dynamics 365. When creating a new category, be sure to complete the following fields:
- Code
- Description
The Parent Category field is optional. Specifying it creates a hierarchical (tree-like) taxon structure in the shop, since categories map to taxons in SellStack.
The Active for Web Order checkbox controls the visibility of the SellStack taxon.
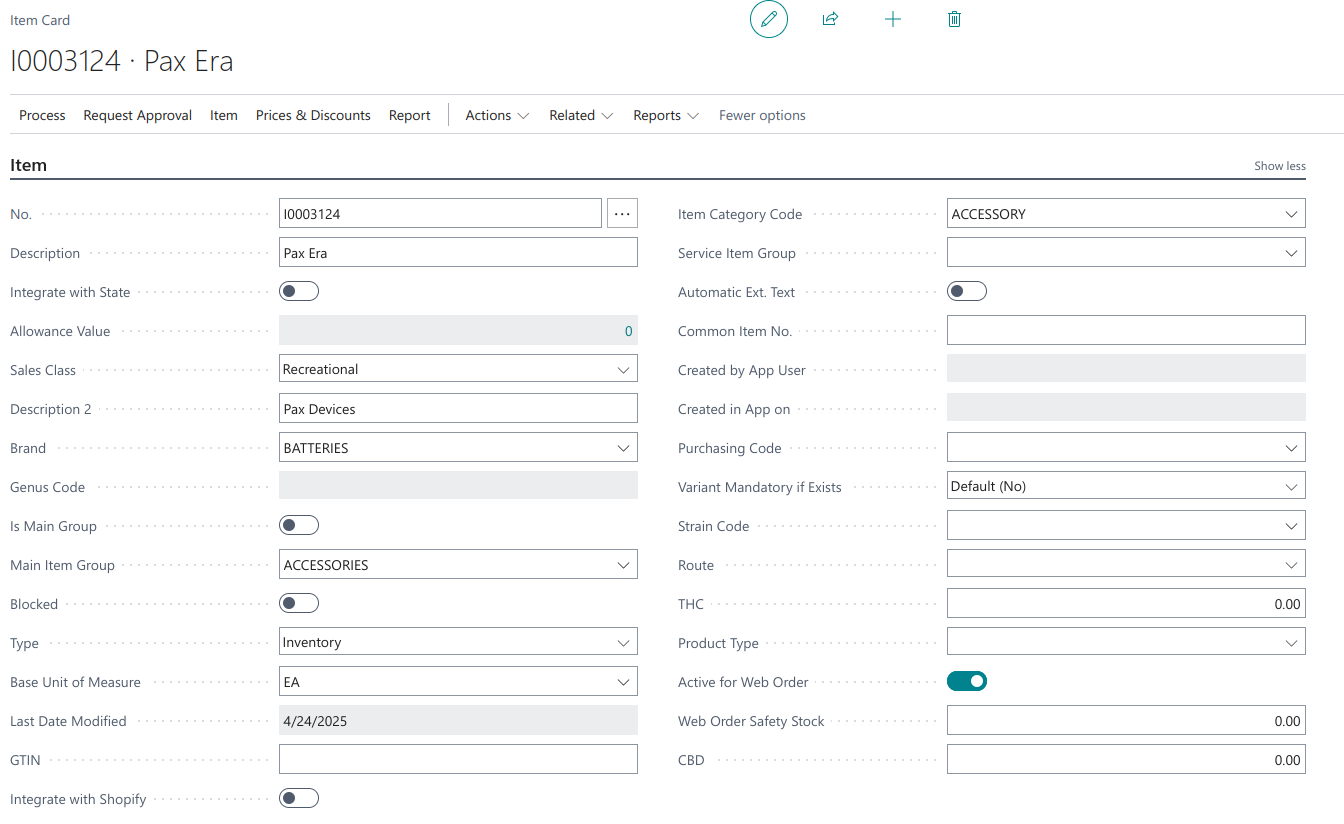
Items
A Product in SellStack is created from the Item entity in 365. The Item Card is located in the Sales Setup -> Items. Your form can vary a bit from the images below. The following fields are the most important:
- No (ID field)
- Description (product’s name)
- Description 2 (product’s short description in SellStack)
- Brand (this field can be used as a filter in the shop)
- Blocked (ensure this option is unchecked for the product to be visible in the shop)
- Item Category Code (product’s taxon in SellStack)
- Active for Web Order (ensure this option is checked for the product to be visible in the shop)
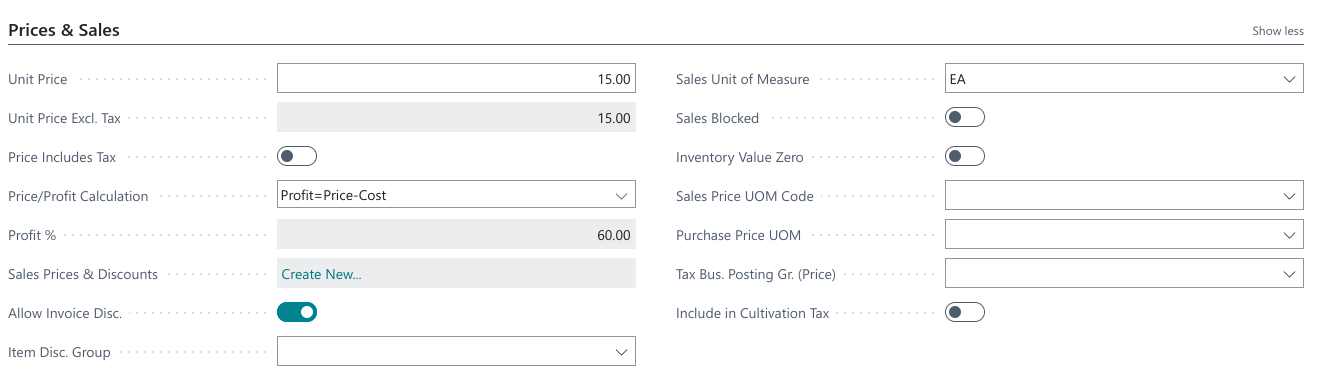
- Unit price (used for calculating the product’s price)
- Sales Blocked (ensure this option is unchecked for the product to be visible in the shop)
- Sales Unit of Measure (used for calculating the product’s price)
Pricing calculation
We use a rule-based formula to derive product prices in SellStack from Dynamics 365 data, following this priority list:
- Price = List Price (if list price is set in 365)
- Price = Unit Price * Lot Size (if both fields are set in 365)
- Price = Unit Price * Qty. per Unit of Measure (if both fields are set in 365)
- Price = 0
Lot Size can be set in the Replenishment section in the Item Card.
Qty. per Unit of Measure is set through a Sales Unit of Measure field.
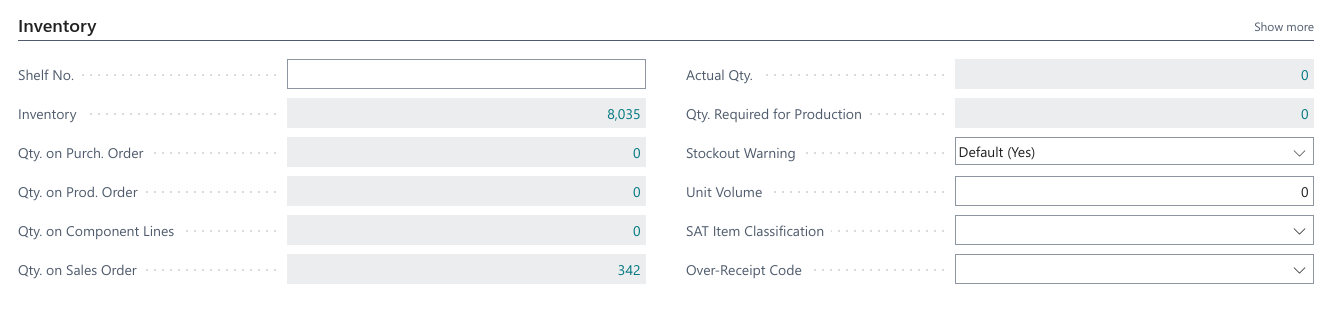
Inventory
In the Inventory section in 365, you can see how many items are available (Inventory field) and how many items are reserved (Qty. on Sales Order).
Lot numbers
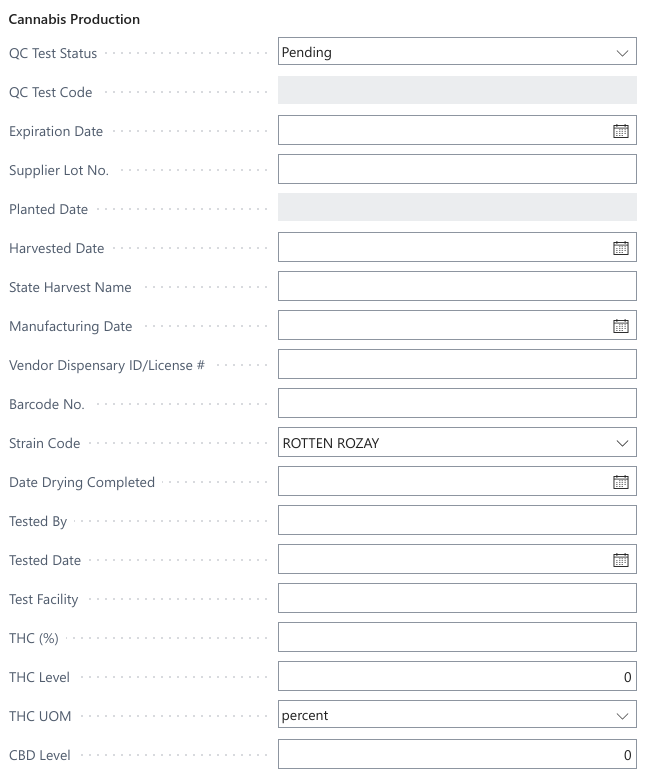
Each product can be associated with multiple lot numbers (Item Card → Related → Lot numbers). To activate a lot number, ensure it is not blocked and that Active for Web Order is checked. In the Lot No. Information Card, you can view the inventory status of each lot number.

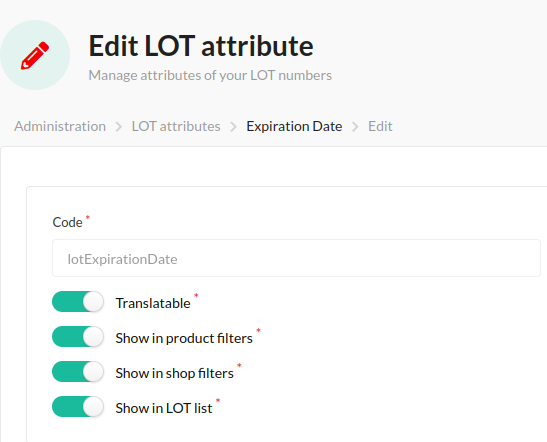
Here you can also define lot attributes - such as expiration date, THC level, CBD level, and more (see the image below), which customers can use to filter products in the shop.
Lot attribute values are, by default, hidden everywhere. To use them for filtering on the product page, check the “Show in product filters” option in Admin -> Lot Attributes. To use them for filtering on the shop page, check the “Show in shop filters” option. To make lot attribute values visible on the product page in the lot numbers dropdown, check the “Show in LOT list” option.